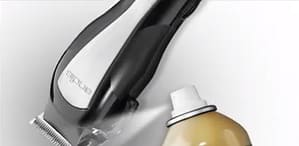
Looking for an effective way to clean your clippers? Discover the popularity of using alcohol as a go-to cleaning solution. Alcohol is known for its powerful disinfectant properties, making it an excellent choice for removing grime and buildup from clippers. However, it’s crucial to handle alcohol correctly to ensure you don’t damage your clippers or pose any harm to yourself.
Learn the proper techniques and precautions to make the most of this alternative cleaning method and keep your clippers clean and sanitized.
In this article, we will delve into the benefits of using alcohol on hair trimmers and how to clean your clippers with alcohol properly.
Is Alcohol an Effective Solution for Cleaning Clippers?
Yes. Alcohol, especially isopropyl alcohol or rubbing alcohol, possesses potent antimicrobial properties. It effectively kills many microorganisms, including bacteria, viruses, and fungi. This makes it an ideal choice for disinfecting and sanitizing clippers. Moreover, it minimizes the risk of infections.
Alcohol evaporates rapidly, leaving behind minimal residue. This is useful when cleaning clippers, as it ensures the equipment dries quickly, reducing the risk of moisture buildup that can promote bacterial growth. Additionally, the quick evaporation minimizes the chances of the alcohol damaging the clipper components.
Lastly, Alcohol is readily available in various concentrations and is relatively affordable. It can be easily procured from local pharmacies, beauty supply stores, or online retailers. The accessibility and cost-effectiveness make it a practical choice for maintaining cleanliness in hair salons and barber shops.
How to Use Alcohol to Clean Clippers
Cleaning clippers with alcohol is a simple and effective process that helps maintain hygiene in hair salons and barber shops.

Required Cleaning Tools
- 70% Isopropyl Alcohol
- Soft-bristles cleaning brushes
- Soft and lint-free microfiber cloth
- Clipper Oil
- Safety Gloves
- Bowl
Let’s begin by preparing the clippers for cleaning by removing hair and debris and checking for any damages.
1. Preparing the Clippers for Cleaning
Start by turning off and unplugging the clippers from the power source. This ensures safety during the cleaning process.
Removing Hair and Debris
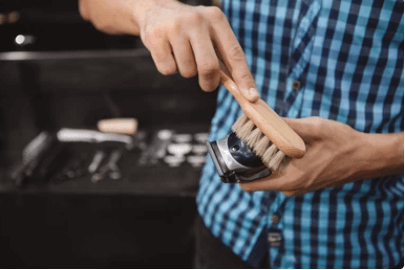
Take a small, soft-bristle cleaning brush and gently brush the clipper blades and combs to remove hair or debris. Pay close attention to the areas where hair tends to accumulate, such as between the teeth of the blades. Be thorough in this step to ensure that the clippers are free from any obstructions that could hinder their performance.
Checking for Any Damages
While cleaning, inspect the clippers for any signs of damage or wear. Look for loose or broken parts, damaged blades, or any unusual sounds or vibrations during operation.
If you notice any issues, it is advisable to consult a professional or contact the manufacturer for further guidance.
Inspect the power cord for any fraying or exposed wires. Damaged cords should be replaced promptly to avoid any electrical hazards.
2. Disassembling the Clippers (if applicable)
Not all clippers can be quickly disbanded for cleaning, but if your clipper model allows it, disassembling them can provide a more thorough cleaning.
Check out our guide for hair clippers.
Before proceeding with disassembly, follow the manufacturer’s instructions to ensure you follow the correct procedure for your specific clipper model.
Removing the Blades and Combs
Start by carefully removing the blades and combs from the clipper. This typically involves unscrewing or detaching them according to the manufacturer’s instructions. Take note of the order in which the blades and combs are removed, which will help reassemble them correctly later.
Following the Manufacturer’s Instructions
Always follow the manufacturer’s instructions when disassembling the clippers. These instructions may vary based on the clipper model and design.
They will provide you with specific guidance on how to safely remove the blades and combs without causing any damage to the clipper or yourself.
If your clipper does not allow disassembly, skip this step and proceed to the next section.
3. Cleaning the Blades and Combs
This step is crucial for removing any residue, bacteria, and debris that may have accumulated.
Using an Alcohol Solution
Prepare a solution of isopropyl alcohol and water. The recommended ratio is 70% isopropyl alcohol to 30% water.
Fill a small container jar or bowl with the alcohol solution, ensuring it is deep enough to submerge the parts.
ForPro Multi-Cide Disinfecting Jar for Barber Tools
Check Price on AmazonScrubbing and Disinfecting the Parts
Place the blades and combs in the alcohol solution, ensuring they are fully submerged. Allow them to soak for a few minutes to loosen debris and sanitize the surfaces.
Next, gently scrub the blades and combs using a soft-bristle brush to remove any remaining hair, oils, or buildup. Pay attention to all surfaces. Don’t apply excessive pressure.
For stubborn residue, you can use a toothbrush or cotton swab dipped in the alcohol solution to target specific areas.
Q-tips Cotton Swabs For Hygiene and Beauty Care
Check Price on AmazonAfter scrubbing, rinse the blades and combs under running water to remove any residue or alcohol solution. Take care not to wet any electrical components if the blades are detachable.
Drying and Reassembling
Pat the blades and combs dry using a clean, lint-free cloth, or let them air dry completely. Ensure there is no moisture remaining before reassembling the clippers.
Double-check that everything is aligned correctly and secured.
4. Sanitizing the Clipper Housing
Follow these steps to sanitize the clipper housing using alcohol effectively.
Applying Alcohol to Housing
Moisten a clean, lint-free cloth with the isopropyl alcohol solution. Ensure the cloth is damp but not dripping wet.
Wiping and Disinfecting the Surfaces
Gently wipe the clipper housing, including the handle, buttons, and other external surfaces, with the alcohol-moistened cloth. This step helps eliminate any bacteria or viruses that may be present in the clipper housing.
Drying and Finishing Touches
Allow the clipper housing to air dry, or use a clean cloth to pat it dry. Ensure there is no moisture remaining before storing or using the clippers again.
Additionally, you may apply a thin layer of clipper oil to lubricate any moving parts or hinges for better performance.
5. Drying and Reassembling the Clippers
Allowing the Parts to Air Dry
Place the cleaned blades and combs on a clean, dry surface and allow them to air dry completely.
It is essential to avoid using heat sources such as hairdryers or heaters to accelerate the drying process, as excessive heat can damage the components of the clippers.
Reassembling the Clipper Components
Once all the parts are arid, carefully reassemble the clipper parts according to the manufacturer’s instructions. Pay attention to adequately aligning the blades, combs, and other detachable parts.
Make sure to securely tighten any screws or fasteners to ensure that the clippers are assembled correctly and will operate smoothly.
If you have doubts or are unsure about the reassembly process, consult the manufacturer’s instructions or seek professional assistance.
Safety Precautions
While cleaning clippers, it is vital to take the following safety precautions:
Ventilation: Ensure that the area where you clean the clippers is well-ventilated. The fumes from alcohol can be strong, and proper ventilation helps dissipate these fumes, reducing any potential inhalation risks.
Avoid contact with Eyes and Skin: Alcohol can irritate the eyes and skin, especially if you have sensitive skin or open wounds. Wear gloves to protect your hands and avoid eye contact or other sensitive areas.
Read the manufacturer’s instructions: Different clipper models may have specific cleaning instructions. It is crucial to read the manufacturer’s guidelines or consult the user manual to ensure you follow the recommended cleaning procedures for your particular clippers.
Power Off and Unplug Clippers: Before cleaning, turn off and unplug the clippers from the power source. This reduces the risk of electric shock or accidental activation of the clippers during the cleaning process.
FAQs
The frequency of cleaning largely depends on how frequently you use them. To maintain optimal performance and prolong the lifespan of your machine, we recommend cleaning your clippers after every use. Additionally, it’s beneficial to oil the blades every two to three uses to keep them sharp and in top condition.
Conclusion
Maintaining clean clippers is a matter of aesthetics and crucial for hygiene and client safety in hair salons and barber shops.
Throughout this article, you have learned to clean the clippers using alcohol. But always take safety precautions, as alcohol is flammable.
Incorporate these cleaning practices into your routine, and your clients will appreciate the attention to detail and the hygienic environment you provide. Daily or after-use cleaning will keep your clippers long-lasting and efficient.


